Break the Bear’s Paw block into bite-sized steps. Get my best tips for accurate HSTs, flying geese, and corners that meet cleanly, even if you are a beginner.
The Quilt Mark
October 22, 2026
Classic Sawtooth Star Quilt Block
Learn to sew a classic Sawtooth Star quilt block with traditional Flying Geese points, accurate cutting charts for multiple sizes, and tips for crisp points.

Clara Jenkins
Clara Jenkins is an avid quilter and fabric enthusiast who has been designing and piecing together quilts for over twenty years. She shares her passion for color coordination, block design, and practical sewing techniques to help makers of all skill levels create beautiful, lasting heirlooms. Through Quiltmark, Clara aims to make the timeless art of quilting accessible, joyful, and deeply rewarding for everyone.
Updated October 22, 2026
The Sawtooth Star is one of those blocks that looks fancy, but it is really just a few simple units doing honest work. I still remember the first time I made one and realized, oh. This is it. This is the block that can carry an entire quilt, play nicely with scraps, and still look crisp and traditional.
In this tutorial, we will sew a classic Sawtooth Star the way it is traditionally built: an unequal nine-patch based on a 4 by 4 grid, with four Flying Geese units creating the star points. I will walk you through a beginner-friendly method that still lands clean points and reliable math, with cutting dimensions for several common sizes.
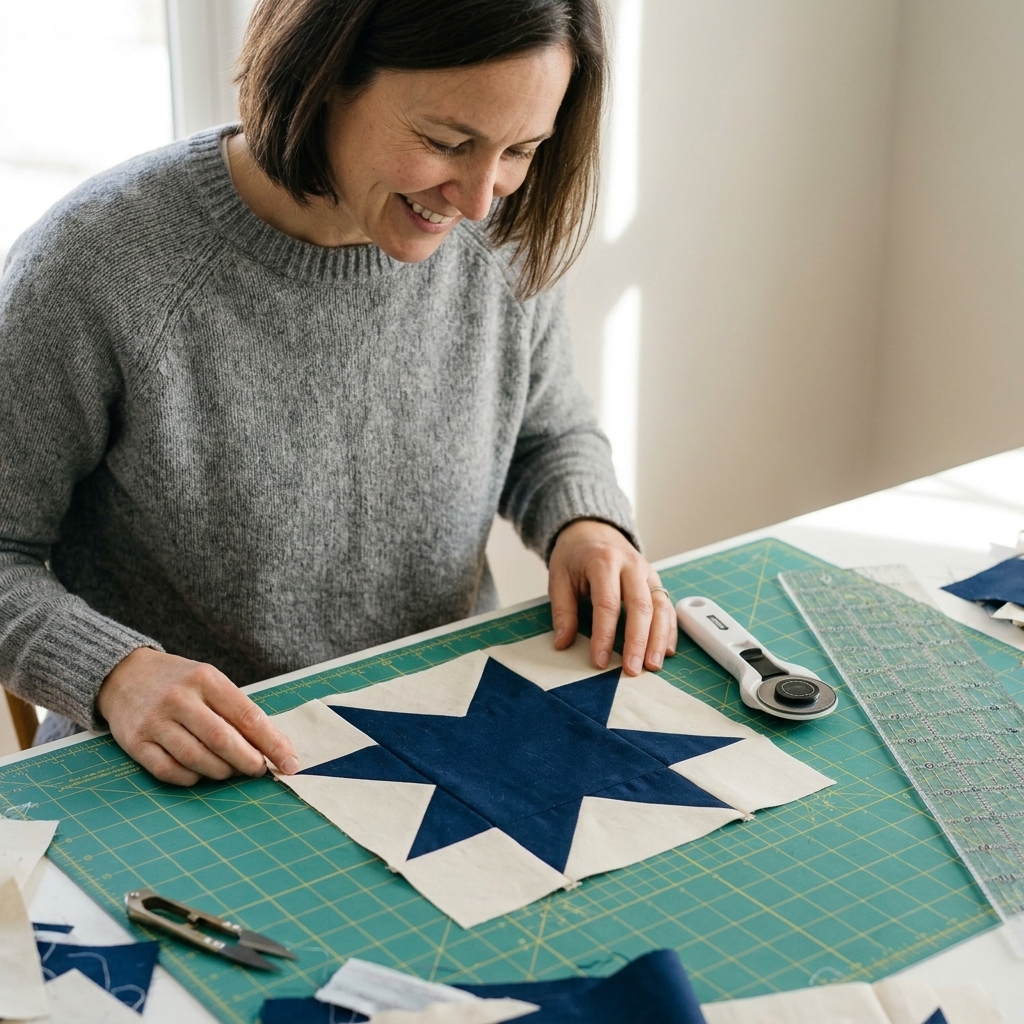
What makes it classic
A traditional Sawtooth Star is not an even 3 by 3 grid of identical squares. It is an unequal nine-patch arranged in a 3 by 3 layout, but the pieces are different sizes. The structure is based on a 4 by 4 grid:
- 1 large center square
- 4 small corner squares
- 4 Flying Geese units (these create the star’s points and the classic eight-point star look)
The secret is that each Flying Geese unit finishes the same height as each small corner square, and the center square finishes twice that size. Once you see that, the whole block becomes very predictable, in the best way.
Tools and materials
- Two fabrics: star fabric and background fabric
- Rotary cutter, mat, and clear quilting ruler
- Sewing machine with a fresh needle (an 80/12 is my everyday choice)
- Thread (neutral or matching the background is forgiving)
- Iron and pressing surface
- Optional but helpful: starch or pressing spray, seam roller, and a square ruler close to your block size
- Optional but very helpful: a Flying Geese ruler for squaring up
Fabric note: High contrast makes the star pop and makes it easier to check your accuracy. Cream background with a deep navy star is a classic for a reason.
Cutting chart
This chart is for a classic Sawtooth Star made with Flying Geese. Sizes are listed as finished (after sewn into the quilt) and unfinished (what your block measures when it is complete but not yet sewn to anything else).
Seam allowance: Use a 1/4 inch seam allowance throughout.
| Finished block | Unfinished block | Center square cut (1) | Corner squares cut (4) | Geese rectangles cut (4) | Sky squares cut (8) |
|---|---|---|---|---|---|
| 6 in | 6 1/2 in | 3 1/2 in | 2 in | 2 x 3 1/2 in | 2 in |
| 9 in | 9 1/2 in | 5 in | 2 3/4 in | 2 3/4 x 5 in | 2 3/4 in |
| 12 in | 12 1/2 in | 6 1/2 in | 3 1/2 in | 3 1/2 x 6 1/2 in | 3 1/2 in |
| 15 in | 15 1/2 in | 8 in | 4 1/4 in | 4 1/4 x 8 in | 4 1/4 in |
How this math works: The block is based on a 4 by 4 grid. Each small unit finishes at one-quarter of the finished block size. Cut sizes include the extra 1/2 inch for seam allowances.
- Corner squares: (finished block ÷ 4) + 1/2
- Center square: (finished block ÷ 2) + 1/2
- Flying Geese unit (unfinished): same height as the corner square cut, and twice as wide as the corner square cut
Step 1: Make the Flying Geese
We need four Flying Geese units. Each one finishes as a rectangle that is one small-unit tall by two small-units wide (so for a 12 inch finished block, each geese finishes 3 inches by 6 inches). The method below is the traditional stitch-and-flip method. It is simple and reliable, but it does leave you with a couple of trimmed-off triangles per unit.
Stitch and flip
Start with one rectangle: Take one geese rectangle (star fabric) and two sky squares (background fabric).
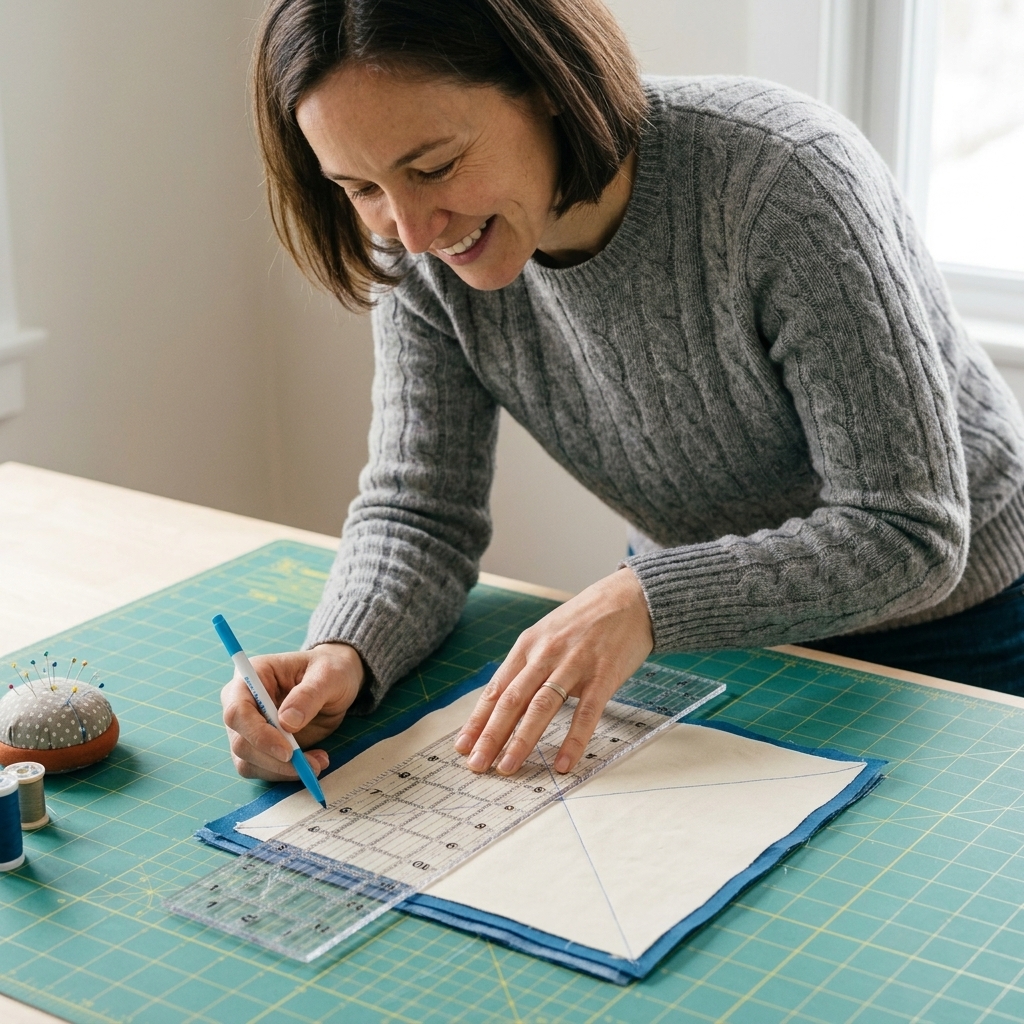
Mark the squares: On the back of each sky square, draw a diagonal line corner to corner.
Sew the first corner: Place one sky square on one end of the rectangle, right sides together, with the diagonal running from the outer corner down toward the center of the rectangle. Sew directly on the marked line.
Trim: Trim 1/4 inch beyond the seam line, then press the sky triangle open.
Sew the second corner: Repeat on the other end of the rectangle with the second sky square. Sew on the line, trim, and press open.
Repeat: Make four identical Flying Geese units.
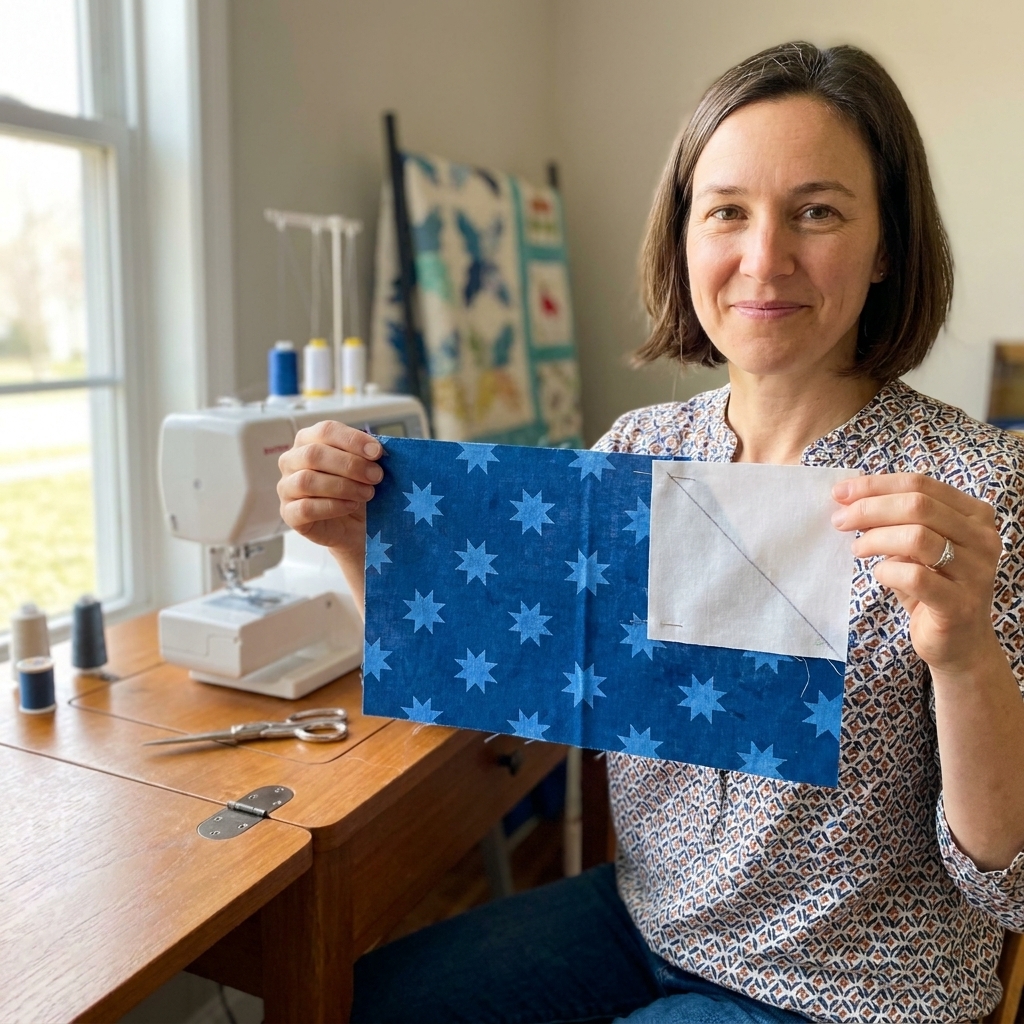
Accuracy tip: Flying Geese love to grow little ears at the corners. If yours do, trim them off and keep going. If your unit is consistently oversized, you can square it up to the correct unfinished size listed in the cutting chart.
Step 2: Square up
This is the part that takes your star from “cute” to “crisp.” Before you sew the block together, you want:
- Corner squares: still at the cut size from the chart
- Flying Geese: trimmed (if needed) to the unfinished size from the chart, the same height as the corner squares and twice the width
How to square up a Flying Geese unit: Use a ruler with clear 45 degree lines if you have one. Line up the ruler so the point of the goose (the star fabric triangle) sits centered, and make sure the unit measures the correct unfinished height and width before trimming the right and top edges. Then rotate the unit and trim the remaining sides to bring it to the exact unfinished size. You are aiming for a clean 1/4 inch seam allowance above the point.
If your Flying Geese are a touch large, trim them to size. If they are a touch small, do not panic. Sew a test seam with your chosen quarter-inch seam allowance and see if everything still fits before you remake anything.
Step 3: Lay out
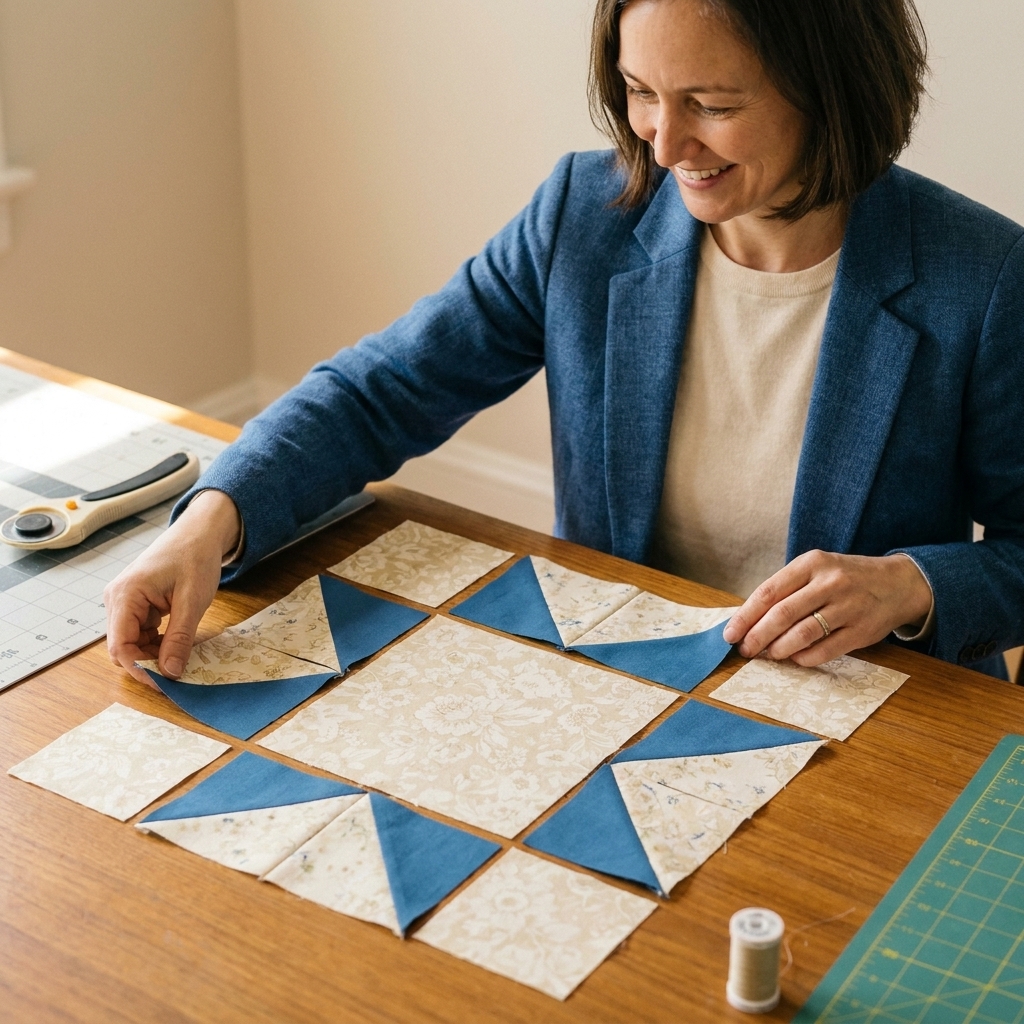
Arrange your pieces into a 3 by 3 layout. This is the unequal nine-patch part:
- Center: 1 large center square (star fabric)
- Corners: 4 small corner squares (background fabric)
- Edges: 4 Flying Geese units
Rotate the Flying Geese so the star fabric triangles point toward the center square. Take a breath here and step back. If anything looks odd, it is almost always a rotated geese unit.
Step 4: Sew rows
Sew the block in three rows, then sew the rows together.
Sew the rows
Top row: Corner square + Flying Geese + corner square.
Middle row: Flying Geese + center square + Flying Geese.
Bottom row: Corner square + Flying Geese + corner square.
Press the seams
First, press to set each seam (a quick press right as it comes off the machine). Then:
I like to press the seams in the top and bottom rows toward the corner squares, and press the seams in the middle row toward the center square. This sets you up so the long seams can nest when you sew the rows together.
Sew the rows together
Pin intersections: Match seams where units meet. If you want extra control, put a pin straight through the intersection, then a second pin beside it.
Sew top to middle: Use a steady 1/4 inch seam, then press.
Add the bottom row: Sew, then press again.
Final press: Press from the front with a little steam if your fabric can handle it. Think “lift and set,” not “push and drag.” Dragging is how we earn those sneaky little waves.
Clean points
Perfect points are mostly about protecting the seam allowance and keeping unit sizes consistent. Here are my go-to habits:
- Confirm your seam allowance once. Sew a test seam on scraps, press, and measure. A scant quarter inch often makes blocks behave.
- Square up your Flying Geese. A tiny trim is easier than trying to bully a block into matching later.
- Pin at the critical spots. Especially where the Flying Geese meet the center square.
- Press for nesting. Opposing seam directions are your best friend in a star block.
- Press, do not iron. Gentle up-and-down keeps everything square.
If your star points are getting chopped, the culprit is usually a creeping seam allowance when you sew the rows together, or Flying Geese that are not all the exact same size.
Troubleshooting
My block is too small
Most often, this is a seam allowance that is a hair too wide. Try a scant quarter inch and make sure your Flying Geese are not being trimmed too aggressively.
My block is too big
This usually means your seam allowance is too narrow, or your units are slightly oversized. Square up your Flying Geese and confirm your corner squares are the correct cut size.
My block is wavy
Bias edges show up around those geese corners. A light starch before cutting and a gentler press make a big difference.
My points do not meet neatly
Check that all four Flying Geese are oriented correctly and that your row seams are pressed for nesting. When seams do not nest, they slide, and the center shifts.
Easy variations
- Scrappy points: Use four different star fabrics for the geese.
- Two-color star: Alternate two star fabrics in the geese for extra sparkle.
- Fussy-cut center: Put a special motif in the center square like a tiny bouquet or a cameo print.
- On-point setting: Turn the block so it sits like a diamond, then add setting triangles.
FAQ
Can I use HSTs instead of Flying Geese?
You can make star blocks with HSTs, but a classic Sawtooth Star uses Flying Geese for the points. That is what gives it the traditional geometry and the crisp look.
Should I press seams open or to the side?
Either works. Pressing to the side helps seams nest, which helps points match. Pressing open reduces bulk. If you are new, press to the side for the nesting advantage.
How do I size a Sawtooth Star for any measurement?
Start with the finished block size. Divide by 4 to get the finished small-unit size. Add 1/2 inch to get the cut size for corner squares. The center square finishes at double the small-unit size, so its cut size is (finished block ÷ 2) + 1/2. Flying Geese finish at the small-unit height by twice the small-unit width.
How do I make a lot of stars that match?
Chain piece the geese, square them up using the same ruler each time, and make one complete test block before cutting a whole stack. A tiny adjustment early saves a lot of unpicking later.
Final thought
This is one of those blocks that rewards a slow, steady approach. Put the kettle on, clear a little space to lay out your pieces, and give yourself permission to practice. Even a slightly imperfect Sawtooth Star still reads as a star, and stars have been guiding quilters for generations.
Make a few in different colorways and you start to see how endlessly flexible it is. Traditional, modern, scrappy, bold, quiet. It all works.